")


Ever wondered how to start a blog and then left it at that?
Do you love to write? Have a passion you want to share? Maybe you’re looking to start earning an income online? Whatever your reasons, starting a blog could be just the right solution for you.

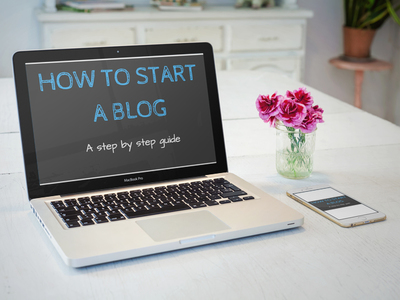
Today I want to help you figure out how to start a blog in the easiest way possible.
When you first jump online and decide to start a blog, it can get quite tricky and overwhelming. How do you know which blogging platform to use? What host do you use? How do you come up with the right name for your blog? Do you need to understand coding?
Sometimes it can feel like you’re walking through a field of mines, one wrong step and it could all blow up in your face.
If you’re anything like me you might’ve been thinking about starting a blog for a long time, but either put it off because you thought it would be too hard, or you were too scared to actually put your thoughts out there.
Well, I’m here to bust those myths and put an end to your confusion.
One of my biggest regrets is not starting out sooner. As you may know, I’ve travelled quite a bit, and I had all hopes of being a travel writer. Every time I went away my mum suggested I should start a blog about my travels, mainly just to put my writing out there. And every time I thought about it but didn’t follow through.
Why? Two main reasons. I was worried about what people would think about my writing and I was scared it would be too hard to start a blog.
BUSTING MYTH NUMBER 1: The internet is a BIG place and it takes a lot of effort and skills to land your posts on page 1 of a google search. If you’re not showing up on page 1 then you’ve really got nothing to worry about. Just start a blog, get used to writing, even if it’s just for your own personal documentation. I wish I had done that with my previous holidays so I could have a record of my memories. You only have to share it with the world once you’re comfortable and ready.
BUSTING MYTH NUMBER 2: Let me assure you, I’m the least tech savvy person going around, so if I can do this, YOU CAN TOO!
It’s because of the ease and accessibility that blogs have become all the rage. Don’t get me wrong, I’ve definitely made a few mistakes along the way, and that’s why I wanted to share my knowledge with you, so you can avoid doing the same.
I’ve made this as straight forward as possible so you can avoid any of the obstacles I’ve experienced. I’d even go as far as to say the steps are so simple, this baby could have a blog up and running by the end of this post.

NOTE: I personally use WordPress so this post will be targeted to setting up your own WordPress blog. This is the platform used by the majority, including serious bloggers. The main confusion I faced when I first started out with WordPress was the difference between wordpress.COM and wordpress.ORG. Not knowing any better, I started out with wordpress.com which was great, until I wanted to start customising the site to suit my business and realised I couldn’t. That’s when I upgraded to wordpress.org and the good thing is, it’s easy to transfer all your content over so you don’t have to start from scratch.
My suggestion: Use wordpress.COM if you just want a personal blog to share with family and friends. Use wordpress.ORG if you’re looking to run a business, this will give you much more flexibility and customisation functionalities.
The steps below are for anyone looking to build an online business and create a blog using Wordpress.org:
Step 1: Choose Your Brand Wisely
This step isn’t included in many ‘how to articles’ and for that reason it’s something I didn’t put a lot of thought into when I first started. A few months down the track I was stuck with a website name I didn’t really resonate with and I had to start again. You’re paying for your ‘domain name’ so make sure you like it and make sure it makes sense.
If you’re looking to start a blog you want to think about it being something that represents YOU. You should spend time on this process. Brainstorm your likes and dislikes, think about your motivation to start a blog and online business, think about what you want to represent, who you are as a person etc.
Also think about the long-term, is it a name you’ll be happy to continue using in a few years time?
Can you come up with a catchy tagline that represents the brand?
Step 2: Set Up Your Domain and Hosting
Hosting is basically a server in the cloud and this is where you can install WordPress. WordPress is not installed on your own computer.
If you’re using wordpress.org you’ll notice one of the hosting services they recommend is Bluehost. After a lot of research and also trialling some other hosting providers, I also personally recommend and use Bluehost as my hosting provider.
Why?
- Well, it’s WordPress recommended
- It’s large and widely used/known
- Offers 24/7 helpful customer service
- Affordable – you can get hosting + a free domain from as little as $3.95/month
- Fast loading
- SUPER EASY TO USE
Now, how do you actually go about setting up your hosting when you start a blog? (these steps are for those wishing to use Bluehost)
a) Head to Bluehost and click the green ‘Get Started Now’ button.

b) Choose which plan you want.
I’ve gone for the plus option because of the extra benefits which suited my business needs – make sure whatever you pick suits YOUR needs. Keep in mind you will be billed the total up front (so if you choose the $6.95 a month option over a 3 year term you will be billed that total amount straight away)

c) Enter your domain name.
Aim to use your brand/blog name from Step 1 as the domain name.

d) Set up your account and choose your extras.
It’s not really necessary to use any of the other offerings. The only one I was recommended and would recommend as well is the domain privacy protection. Fill out all your details and finish creating your account.

Step 3: Install WordPress
The reason I LOVE Bluehost is because of it’s super easy one-click installation process for WordPress. Remember when I said I’m not tech savvy at all? Well this is the easiest process I’ve ever been through and this is a great reason for using this hosting service.
Simply go to the ‘website’ section of your Bluehost home dashboard and click ‘Install WordPress’.


Step 4: Login to WordPress
You can get to your login page by adding /wp-admin to the end of your blog domain.
Eg: www.blogname.com/wp-admin

Once you’re logged in, head straight to your dashboard and familiarise yourself with what you can do. There are helpful Youtube tutorials to show you what every tab does.

The dashboard is your hub – it’s where you’ll write and post your blogs, change the themes, install plugins, edit the site… Everything! So be sure to take the time to get to know it.

Step 5: Choose Your Theme
This is the fun part when you start a blog! But just as important as creating your brand name. Choose your theme wisely as it can be hard to change it down the track once your blog is fully set up with a lot of content. The good thing about WordPress.org is the large selection of free themes you can choose from. You can also see demos and preview them on your own site to see if the style fits your own blog. There’s also premium themes and many other sites which sell wordpress themes.
To access your themes, hover over ‘Appearance’ in your dashboard and click ‘Themes’.
If you want to get a good looking, easy to use theme, there’s a great ‘Marketplace’ tab included in your dashboard. Here you can purchase highly functioning, multi-purpose WordPress themes. And the best part, you don’t need to know about codes to use most of them as they include free installation services and you can even opt to base your site on the demo version so you don’t get the theme and then have to figure out how to actually get it to be laid out like the demo.

After trying out a few different themes, I personally like Highend, which I’m using right now and downloaded direct from the MOJO Marketplace. It’s user friendly, has a variety of options, and has multiple demo versions which you can base your site off so there’s no need for knowing lots of codes.
Step 6: Download Plugins
Plugins are the main reason I made the decision to switch from wordpress.com to wordpress.org. You don’t have access to any plugins with wordpress.com, which means you are very restricted when it comes to your website design and what widgets you can use. When you start a blog it might not seem like a big deal, but keep in mind plugins allow you to be more personable and creative with your site and its design, and they’re great for business.
Here are a few of the plugins I use on my site and ones I recommend for you to install on your blog:
- Jetpack: Provides site stats like number of visitors to your blog, where they come from, day with most visits etc.
- Jetpack (facebook): Jetpack also includes a widget that allows you to add your Facebook fan page to your sidebar so people that visit your blog can also like your fan page.
- Instagram Feed: Allows you to add your Instagram feed as a widget. Readers can see your Instagram photos and easily follow you without having to leave your website.
- Akismet: Protects your blog from spam. You definitely want this!
- Contact Form 7: This form is connected to your email account so users can easily contact you from your site.
- Digg Digg: Floating social media buttons on the side of the page so it’s easy for your readers to share and like your content on social media.
- Google XML Sitemaps: Helps search engines rank your blog better.
- Image Banner Widget: Add banners and images to the sidebars of your site – perfect if you’ve got a business and want to include attractive call to actions on your site.
- WP Canvas- Widgets: More options for widgets including an ‘About Me’ section.
- WPtouch Mobile Plugin: Gives you a mobile friendly version of your site.
- Visual Composer: Allows you to edit your page while you’re on it and no coding required. You can just drag and drop items to exactly where you want them to be placed. Super user friendly!
- Sumo Me: If you’re using your blog for business you definitely want to save this one. It creates customised banners that link directly to your email list.
- Yoast SEO: When you do want people to find your blog, search engine optimisation (SEO) is a big deal. This tool provides a checklist to help you improve your site ranking and make it easier for people to find your posts.
Step 7: Link Social Media & Build Your Email List
Traffic is the key to any online business and most people won’t buy from you straight up so it’s important to keep them engaged. You can do this by creating a bit of a social media loop. Make sure you have your brand on as many social media outlets as possible – especially Facebook, Instagram, Twitter and YouTube. Share your content and drive the traffic from one platform to another, this way your audience stays engaged, receives far more value, and is more likely to sign up to your email list and buy your offers.
For example:
- have your blog or Facebook fan page/group linked in your Instagram bio
- have a pinned post on your Facebook fan page that mentions your blog, Instagram, Youtube, Twitter etc.
- share your YouTube videos on Twitter or your Facebook fan page
The opportunities are endless. Mix it up, but always make sure you’re making the most of your content and sharing it on multiple platforms.


If you are looking to start a blog to earn an income then you definitely need to think about building your email list.
This will become the lifeline of your business. Like I said before, people won’t buy your offer straight away. They generally need to see something up to seven times before they will consider it. This is why growing an email list is so important. This is the best way for you to stay in touch with potential customers and make sure they stay engaged.
When you do start growing a list, you’re going to need a system to be able to capture all these email addresses and be able to email your contacts automatically. This is known as an auto-responder. A great tool for this is GetResponse – it’s affordable and super easy to use and has a large variety of email options and web forms to choose from. You can link your GetResponse campaigns to your Sumo Me and this is how you’re able to grow your email list from your blog.
Step 8: Start Blogging
Now the easy part is over and you have a fully functioning blog, the hardest part is to start writing. All I can say is don’t put this off. Until you learn how to get your site on page one of google. And until you actually tell people to go to your site. You’ve got nothing to worry about. So just start. And you’ll learn to enjoy the process.
Want to start your own travel blog? Access the same course that taught me how.
Good Luck! 🙂
Jade xo
P.S. If you like what you’ve read feel free to like, comment, or share. Your time reading my post is greatly appreciated. 🙂
**Please note, there are affiliate links in this post. The services I have recommended are the services I personally use and honestly recommend to anyone wishing to start a business of their own. No extra costs are incurred for you; the referral commission simply contributes to bringing you valuable content.


Love your Blog!!
Oh thank you so much! Love the positive feedback. 🙂
Wow! Such a great post. The steps are so easy to understand. Please keep on doing the great work.
Thank you – I’m so glad you found it useful.